bitmap font renderer

bitmap fonts!!!!!
So I’ve been playing around with a little bitmap font shader in Unity! Let’s go over how it works???
fon’t
First up I needed a font to work with, and because I love reinventing the wheel let’s go make one ourselves
When drawing a font I use an ASCII table to reference both what characters I will need, and what order they should be in to simplify figuring out the characters. If I stick to the ASCII order, then I can swap between numbers and characters with no hassle (65 == A, 66 = B, etc.)
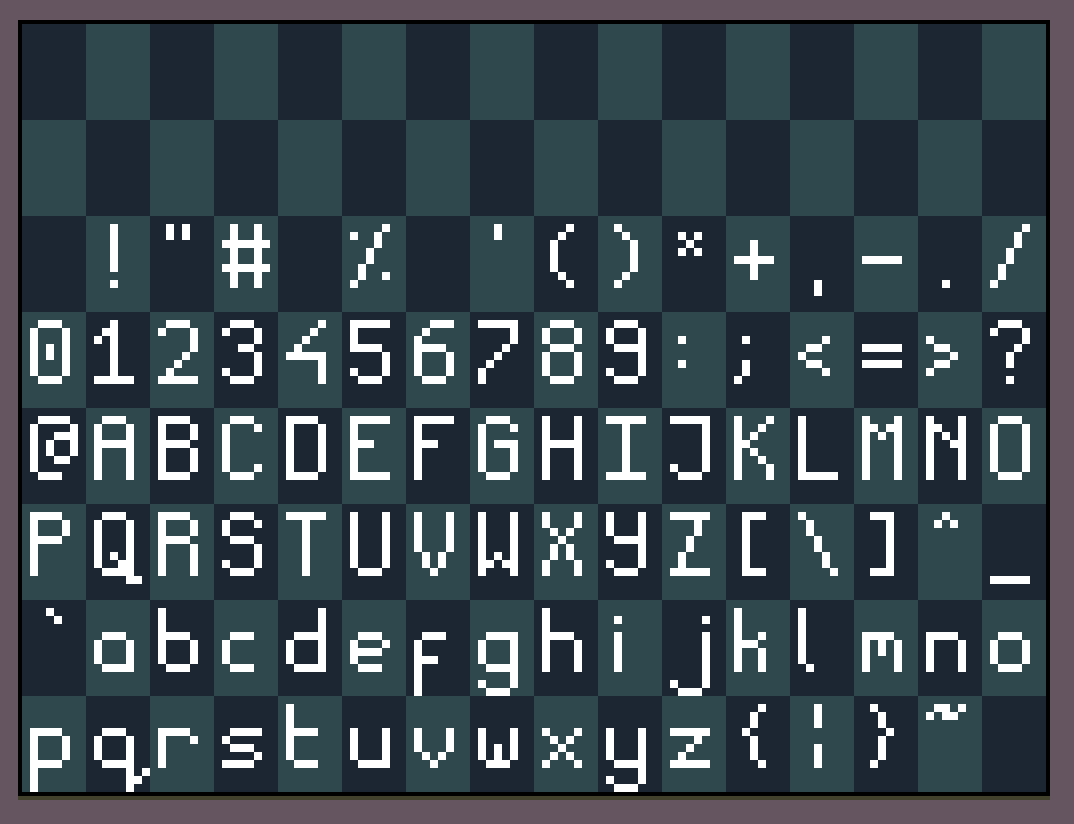
I decided to go with 8x12 for the font, giving me enough room to comfortably work in (especially vertically, since most fonts are taller than they are wide), and set out a few little rules to help me go.
⚠️ disclaimer: i know very little about how to make fonts!!! making fonts is a Whole Thing and you should look up some cool info about that instead of me making it up as i go ⚠️

For legibility, layout and consistency I stuck to a main 5x5 section for the “body” of the letter, with a section above and beloy for any extended parts. Aside from that, I kept style consistent throughout by sticking to the same shape of curve on all the letters. It’s far from perfect but simple enough to draw out all the letters and is legible enough for what I want.
An Shader Plan
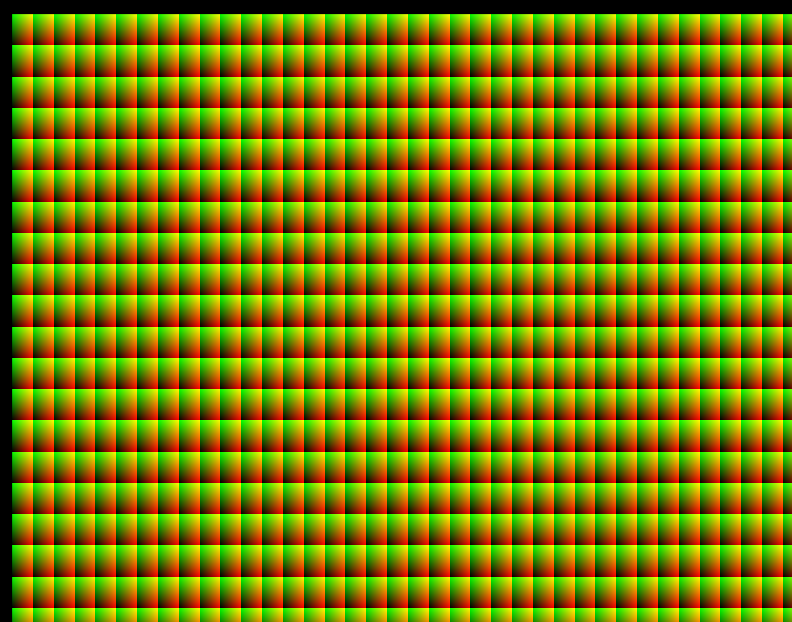
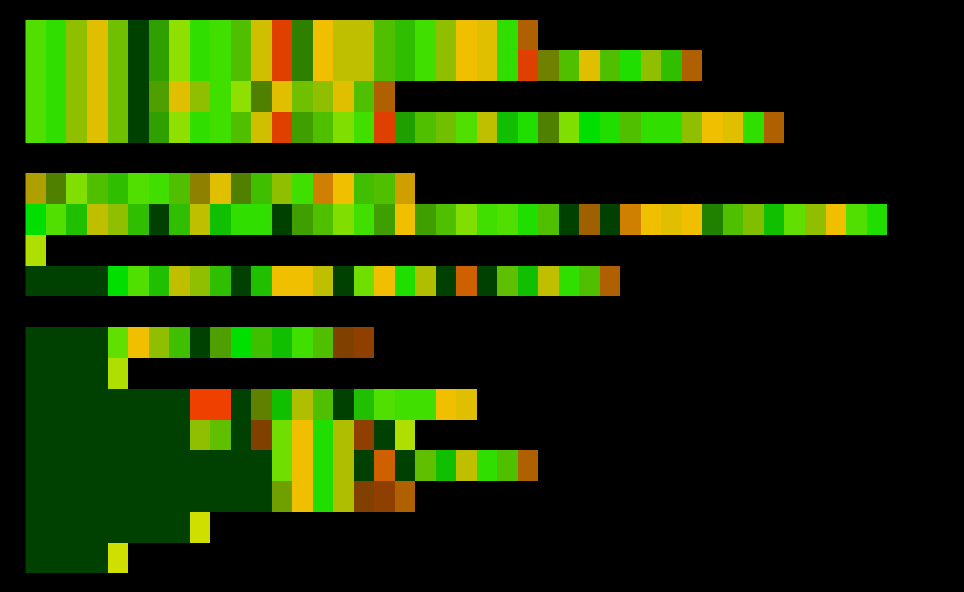
My idea for rendering this font was to draw the index of every character to a pixel in a texture, then use a shader to render the font character in place of each pixel. The texture would end up looking something like this:

So lets go about generating this texture!
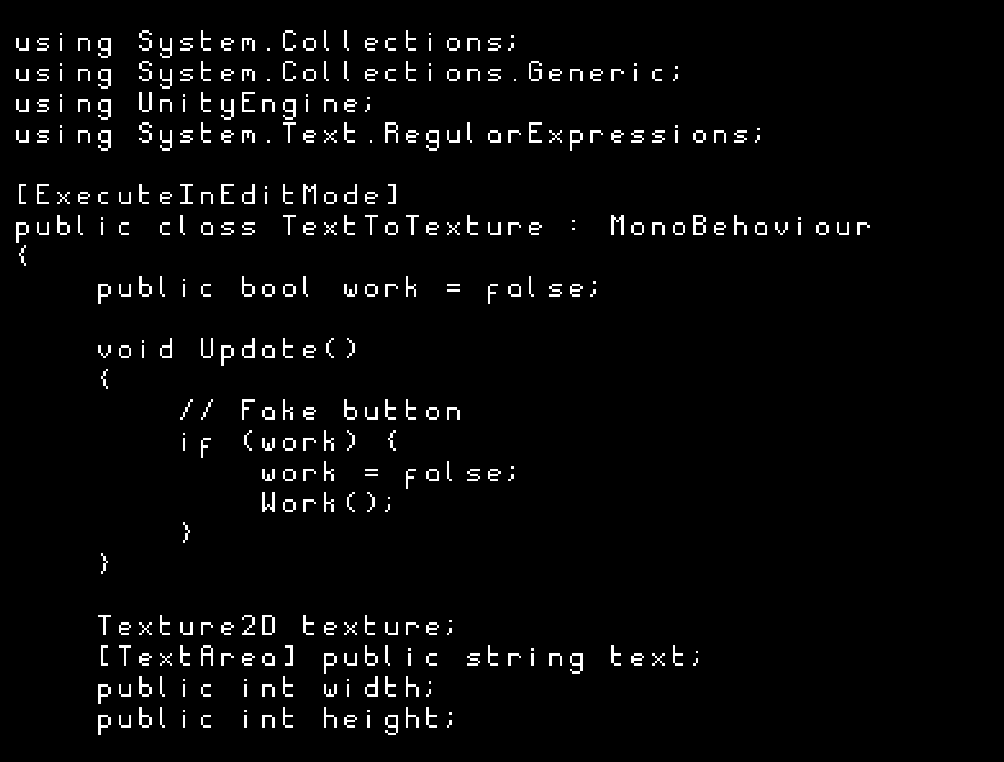
After adding a quad to my scene, I started my generation script, which needs a few bits of setup:
// The input text, and the material to apply the texture to
public TextAsset textFile;
public Material material;

// How many characters to display on our texture, will literally be the dimensions of the texture
public int width;
public int height;

/*
    My favourite way of adding a cheap button to the inspector.

    When you click the `work` checkbox, it'll call the method and unset itself
    immediately; meaning you can call the function on demand instead of as part
    of Start() or on a key press etc. I use this all the time for testing and
    prototyping
*/
public bool work = false;
void Update()
{
    // Fake button
    if (work) {
        work = false;
        Work();
    }
}

void Work()
{
    print("Hello!");
}
And now we can get to work on the actual stuff!
void Work() {
    Texture2D texture = new Texture(width, height);

    // When working with textures as data rather than images as we are, it is super
    // important to turn off texture filtering, or we'll get some messed up images.
    // I'll put some examples of such at the end of the post for fun
    texture.filterMode = FilterMode.Point;

    // We will be calculating the x, y coordinate of each character instead of
    // iterating over every pixel of the texture
    int x = 0;
    int y = height - 1; // We want to start at the top of the texture, not the bottom
    for (int i = 0; i < text.Length; i++) {
        if (text[i] == 10) { // Newline character
            x = 0;
            y -= 1; // Move to the start of a new line
        } else {
            texture.SetPixel32(
                x, y,

                // Color32 uses bytes instead of floats for each channel, which makes
                // more sense for us since we're reading "bytes" from the text itself
                new Color32(
                    (byte)text[i],
                    0,
                    0,
                    0
                )
            );

            x += 1;
        }

        // It is faster to use SetPixels32() instead of setting each pixel individually!
        // I am only using SetPixel32() here for ease of explanation, and since it
        // shouldn't be *too* slow since we don't need to do it a lot anyway.

        // You will also want to make sure you aren't writing outside the bounds of the texture!
        // Again, I left this out for brevity/clarity.
    }

    // When writing to a texture you gotta remember to tell unity you updated it!
    texture.Apply();

    material.SetTexture("_MainTex", texture);
}
And this gets us our Cool greyscale image from before.
Now lets move on to the shader itself. I started out with the default Unlit shader in unity (R-click > Create > Shader > Unlit Shader) and head to the frag() function.
// This is a Unity-provided property which defines the texture dimensions of an input texture
// _MainTex_TexelSize.xy is the width and height of the texture in pixels
// This lets use define one character == one pixel
float4 _MainTex_TexelSize;

fixed4 frag (v2f i) : SV_Target
{
    // The first thing we need to do is get a UV coords for each character,
    // so we can render a character correctly.

    // wrap the input UV by the texture size in pixels
    float2 charUV = (i.uv / _MainTex_TexelSize.xy) % 1.0;

    // Let's look at it to confirm it's working correctly
    return float4(charUV,0,1);
}
 Now we have a 0-1 UV space for where each character should be
However, since each character is only a small part of the font texture, we need to shrink it down some:
fixed4 frag (v2f i) : SV_Target
{
    float2 charUV = (i.uv / _MainTex_TexelSize.xy) % 1.0;
    // Resize the UV based on the font dimensions
    // There are 16 characters across, and 8 characters down
    charUV /= float2(16,8);
}
Now we can work on rendering the font itself:
fixed4 frag (v2f i) : SV_Target
{
    // Individual character UV
    float2 charUV = (i.uv / _MainTex_TexelSize.xy) % 1.0;
    charUV /= float2(16,8);

    // We can extract the character index from the red channel like this
    // The value returned will be in the range 0-1 so we need to expand
    // it to 0-256 for convenience
    fixed4 col = tex2D(_MainTex, i.uv);
    float character = col.r * 256;

    // Since our font texture is 16 characters wide by 8 characters tall,
    // we need to extract the x, y coordinate of the character on the texture
    float2 charIndexUV = float2 (
        floor(character % 16),
        floor(character / 16)
    );

    // Now we map the value back down to the 0-1 range to look it up on the texture
    charIndexUV.x /= 16.0;
    charIndexUV.y /= 8.0;

    // Lets take a look at what's happening
    return float4(charIndexUV,0,1);
}
The red and green colors here should match up with the position of the character on our font sheet! But clearly we can’t necessarily confirm that haha. Lets get fonts on screen
fixed4 frag (v2f i) : SV_Target
{
    // Individual character UV
    float2 charUV = (i.uv / _MainTex_TexelSize.xy) % 1.0;
    charUV /= float2(16,8);

    // Character index UV
    fixed4 col = tex2D(_MainTex, i.uv);
    float character = col.r * 256;

    float2 charIndexUV = float2 (
        floor(character % 16),
        floor(character / 16)
    );

    charIndexUV.x /= 16.0;
    charIndexUV.y /= 8.0;

    // Font render
    float4 fontRead = tex2D(_Font, charIndexUV + charUV);
    return fontRead;
}
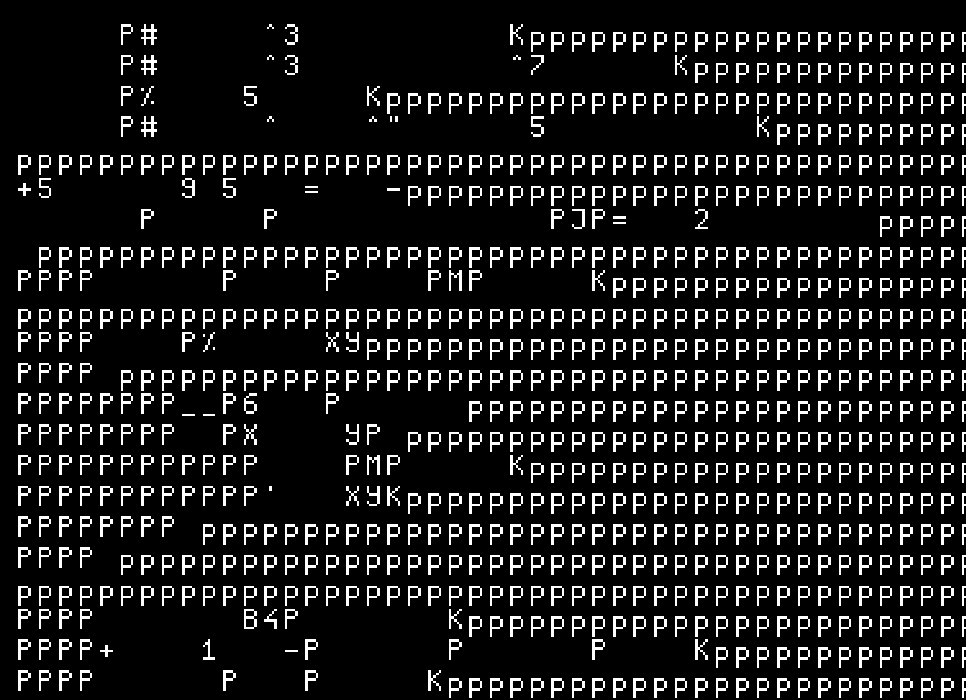
Hooray! It works, first time!!!
Ok so we can at least confirm that each character is rendering correctly, so the UV space calculations all work correctly there, but clearly the offset are wrong for the character index.
It turns out the problem (after a lot of trial and error), was that it was reading the characters from the bottom up, instead of top down like I assumed. This is the line that fixes it:
charIndexUV.y = 7 - charIndexUV.y;
We did it!
Congratulations friends we made a text rending shader! With mine I tried a few things out with it, the main being storing color and animation info in the remaining channels (remember we are only using the Red channel currently!) which allowed me to create the funky gifs with syntax highlighting etc. There are tons of other possibilities tho! Go make something very cool!
I also wrote a little bit of formatting syntax so I could write text files with highlighting and timing (used for the gif at the top). The script itself is below.
Thanks for reading!!
Feel free to contact me via twitter if you have any questions or comments!!!! And please consider supporting me on patreon so I can keep making stuff like this!!!
Appendix
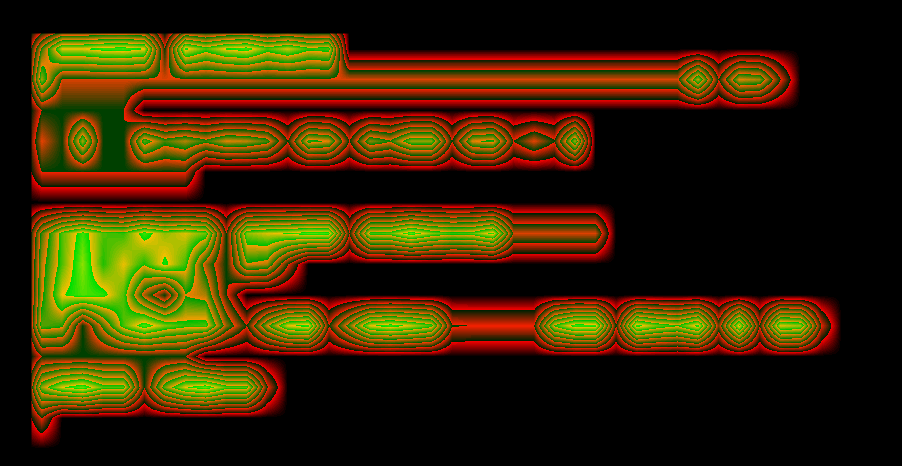
Bilinear filtering on the text texture:

Script used for the first gif
$S5Bootup sequence
[$S2...............$S3.....$S1...........] $S8$C7OK!
$S1
$S5$C4/!\ $C0 WELCOME TO JAZZ OS $C4/!\
$S1
$S5
Detecting input devices$S3.....
$S4$C0Keyboard:$S1 $S8$C7OK!
$S4$C0Mouse:$S1 $S8$C7OK!
$S4$C0VR Device:$S1 $S8$C2Not Found!$S1    $S5$C0but that's ok
$S1
$C5Z$C1o$C2w$C3e$C4e $C5W$C6o$C7w$C8e$C4e$C5!
$S[1-9] Set the speed of the text, higher is faster
$C[0-9] Set the color of the following text
Bilinear Filtering on just the charIndexUV: